
This is a screenshot of my Pinterest account of photographs taken at an Independent retailer in Belfast, which I am using for this particular project.

This is a screenshot of my Pinterest account of more photographs I took at an Independent retailer in Belfast.

This is a screenshot of my Pinterest account with different images I found on Pinterest of both covers and the inside of fashion books, I chose ones which I liked the style or layout of.

This is a screenshot of my Pinterest account with images I found of different fashion books, as I liked how they were layed out as they had a good balance of images and text on them.

This is a screenshot of my Pinterest account with screenshots of both the independent retailer I visited as well as some fashion book layouts.

To open a new document on Photoshop I clicked in File and then New

When the menu came up to select the type of new page I wanted to make sure the page would be A4 I clicked on the Preset section and selected 'International Paper'

Once I had created my new document I wanted to add a heading so I clicked on the 'Horizontal Type Tool'

When I had typed out the title of the book I went to the top toolbar to select the font and also the size, colour and effect

To add colour to my document I clicked on the 2 coloured squares on the left hand toolbar, which brought up the colour picker allowing me to select the right colour

In order to put the colour onto the page I clicked on the 'Gradient Tool' I then clicked the bottom left corner of the page and dragged the mouse diagonally towards the right top corner, this created a contrast between the two colours I had chosen
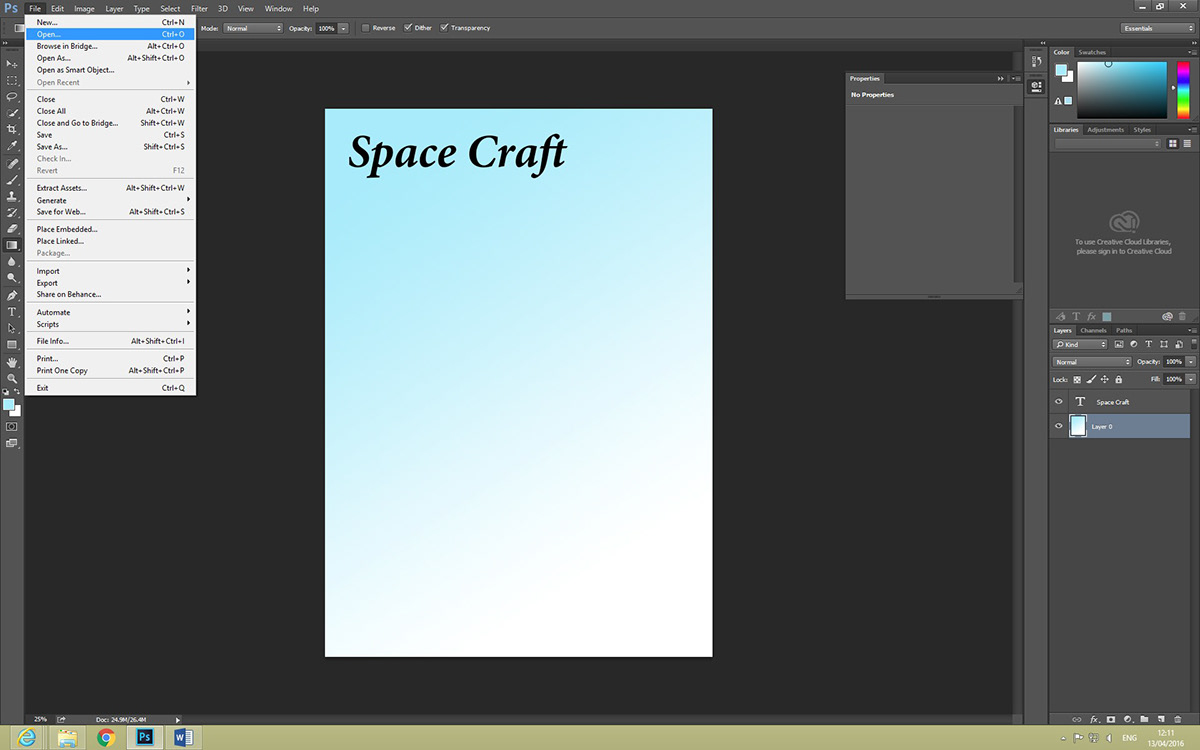
In order to insert images for my book I clicked on File and then Open

The menu then came up for me to select the image I wanted and once I had selected it I clicked Open

The image appears as a seperate document meaning I needed to manipulate the size of it so it would fit onto my page, to do this I clicked on Edit and then Free Transform

I wanted to crop some of the image as there were parts of it that I did not need, to do this I clicked on the Rectangular Marquee Tool which allows me to delete parts of the image I do not need

This is what a page of the book looked like before I had inserted any text

I decided to change the colour of the page to match better with the writing and photos

For the second page of my book I wanted to keep the same title and photo to make it look like a banner

I clicked on File and then Open to pick what photograph to add to the page of my book

Once I selected the photo I clicked on the OK button

I clicked on Edit and then Free Transform to make the picture the right size for the page

This is what the second page of the book looked like before I added any writing

This is the final product of the second page of the book


